Education · All levels
Help a child use the vision they have
A recorded programme on assessing visual capabilities and building everyday activities that develop visual perception in children with reduced vision.
- 25 recorded lessons
- 7 modules · 23 hours
- Printable assessment protocols
- Practice footage from sessions
- Self-paced, no deadlines

Why visual perception needs teaching, not waiting
A child reaches for a toy and misses it by a few centimetres. A picture book that other children love stays untouched. In a room with the wrong light, a familiar face becomes a blur. Reduced vision does not only change what a child sees — it changes how much practice they get at looking, tracking, matching and recognising, the everyday skills that sighted children build without ever noticing.
Parents are often told that nothing can be done, or that the child will simply adapt. Specialists are scarce in smaller towns, waiting lists are long, and a short appointment once a month is not enough to build a habit. Meanwhile the materials at hand are too small, too pale, too crowded, or held at the wrong distance.
This programme was recorded to close that gap. It takes the practical side of visual perception work — assessment, adaptation and daily practice — and turns it into a step-by-step course you can follow at your own pace, at home or in your classroom.
By the end you will know what to look at, what to change in the environment, and which short activities to run this week. Not theory for its own sake: every module ends with something you can try with a child on Monday.
What you will be able to do
Each ability below is taught with a demonstration, a printable protocol and a task you run yourself.
- Assess a child's visual capabilities
Use simple materials and observation protocols to record what a child can see, at what distance and under which lighting.
- Adapt any material to the child's vision
Change size, contrast, background and working distance instead of buying new equipment.
- Run short practice on fixation and tracking
Build a five-minute routine that helps a child hold a target and follow it smoothly.
- Work on colour and contrast through games
Turn sorting, matching and hiding games into deliberate practice for colour recognition and contrast sensitivity.
- Map the usable field of view
Find the part of the visual field a child actually uses, then arrange the desk, page and room around it.
- Support hand-eye coordination
Move from reaching and grasping to drawing, tracing and early writing in small, achievable steps.
- Teach shape, size and distance
Use sorting, nesting and placement tasks to build an understanding of how objects relate in space.
- Write an individual correction route
Set goals, choose activities, fix review points and explain the plan to a family or a school team.
- 25
- recorded lessons
- 23 h
- of video and practice
- 7
- modules
The method: one task, three adaptations
Every activity in the course follows the same loop: observe what the child actually does, change one thing in the material or the setting, then observe again. You are not looking for a diagnosis. You are looking for the version of the task that the child can succeed at today.
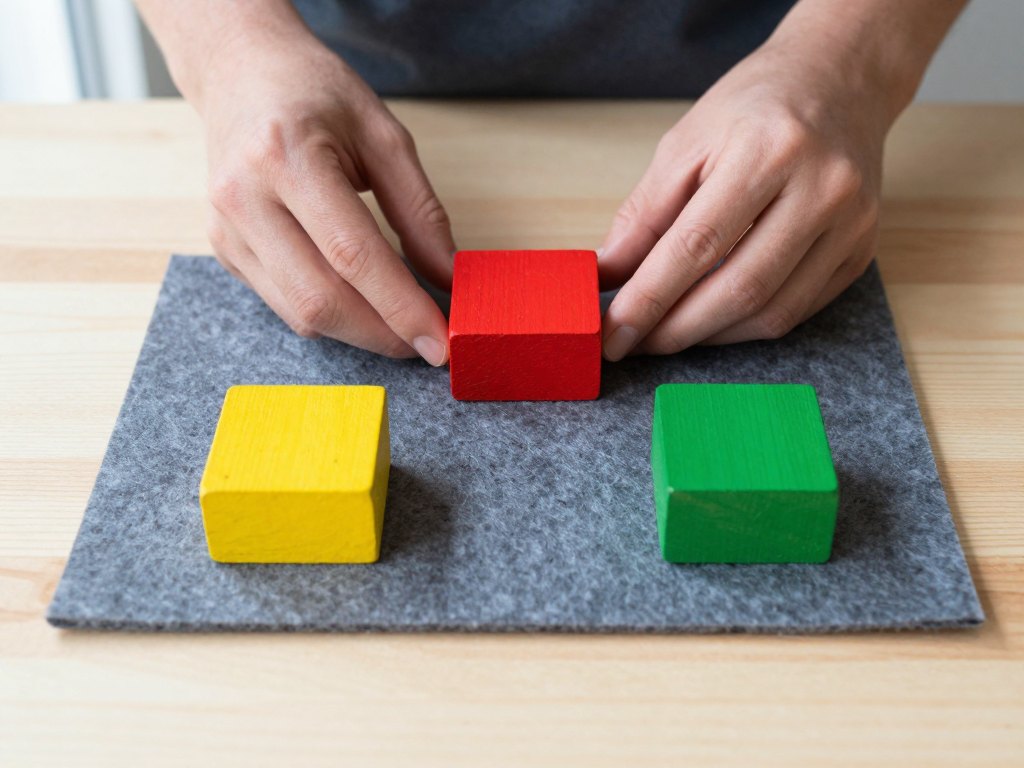
The signature exercise is called one task, three adaptations. Take something the child already meets in daily life — putting shapes into a box, finding a cup, matching socks. Run it three times: once with a larger target, once with stronger contrast, once at a shorter working distance. Note which change made the biggest difference. That note becomes the starting point for the next week.
Across seven modules the loop is repeated for light perception, fixation, tracking, colour, contrast, visual fields, eye movements, two-eyed coordination, hand-eye coordination and the perception of shape, size and distance. The structure stays the same, so the habit survives long after the course ends.
- Observation before instruction
- One change at a time
- Short sessions, repeated often
- Record what worked and why
- Review the route every few weeks
How the course works
The course is fully recorded. Lessons are short — around twenty-five minutes each — so you can watch one during a lunch break and still have energy to try the task afterwards. There is no fixed schedule and nothing is streamed live: you begin when you enrol and move at the pace your week allows.
Each module opens with a video lesson, continues with demonstration footage of activities in progress, and closes with a printable protocol or checklist. The practical assignments ask you to run a task with a child, record what happened, and compare it with the previous attempt. You can do them with your own child, with a child you teach, or with a colleague playing the role of the child if you are studying without access to one.
Everything stays in your account: video lessons, presentation slides, method notes, observation protocols and the individual-route template. You can return to any lesson when a new child joins your group, or when a familiar task suddenly stops working.
The programme
Seven modules and twenty-five lessons. The first two build the foundation, the next four work through the main visual functions one at a time, and the last turns everything into an individual route you can explain to a family or a school team.
1Module 1 — How vision works for learningThe functional basics you need before adapting anything.3 lessons · 3 h
- Light, contrast and colour: what the eye actually uses in a task
- Reading a child's visual profile from existing reports and notes
- How reduced vision changes the way a child explores a room
2Module 2 — The child's visual perception: what to expectHow perception develops when vision is reduced, and what it means for lesson planning.3 lessons · 3 h
- Categories of visual impairment and what they mean for planning a task
- How visual perception develops when vision is reduced
- Vision, touch, hearing and movement working together
3Module 3 — Preparing an assessment that gives useful answersMaterials, lighting and recording — the three things that decide whether an assessment tells you anything.3 lessons · 3 h
- Choosing materials: size, contrast, background and distance
- Setting up the room: lighting, glare and working position
- Recording what you see: observation protocols and checklists
4Module 4 — Light perception, fixation and trackingThe first visual functions to check and the games that build them.4 lessons · 4 h
- Assessing response to light and to a lit target
- Helping a child hold fixation on a still object
- Following a moving object smoothly across the middle of the field
- Games and table tasks that build fixation and tracking
5Module 5 — Colour, contrast and the usable field of viewWhat a child distinguishes, and where in the field they can see it.4 lessons · 4 h
- Assessing colour recognition and colour preference
- Building contrast sensitivity with everyday materials
- Mapping the part of the field a child actually uses
- Arranging the desk, the page and the room around that field
6Module 6 — Eye movements, two-eyed coordination and hand-eye workFrom looking to reaching, grasping, tracing and drawing.4 lessons · 4 h
- Assessing how the eyes move across a page or a shelf
- Tasks for coordination between the two eyes
- From reaching to grasping to drawing: hand-eye coordination
- Practical sequences for the table, the floor and the playground
7Module 7 — Shape, size, distance and the individual routePutting the modules together into a written plan with goals and review dates.4 lessons · 2 h
- Perceiving shape and size: matching, sorting and naming
- Distance and depth in everyday tasks
- Writing an individual correction route: goals, steps and review points
- Documentation, and handing the route to a family or a school team
What you get
- 25 recorded video lessons
Short sessions of around twenty-five minutes, watchable in any order and as often as you need.
- Printable observation protocols
Ready-to-use forms for recording what a child sees, at what distance and under which lighting.
- Practice footage of activities in progress
Short clips showing how a task is set up, run and adjusted when it does not work the first time.
- An individual route template
A structured document for goals, activity choices and review dates you can share with a family or a team.
- Method notes and presentation slides
The written version of each module for quick reference between sessions.
- Self-paced access
No deadlines, no live meetings and no fixed start date — begin when you enrol.
- 14-day money-back guarantee
Read the lessons, try one task with a child, and decide within two weeks.
Three habits that make the work go better
Keep sessions short. Five to ten minutes of focused practice, repeated several times a week, does more than a single long session that leaves the child tired and unwilling. The lessons show you how to end a task while the child is still interested.
Change one thing at a time. If you enlarge the picture, move the lamp and shorten the distance in the same attempt, you will not know which change helped. The protocols are built around single changes so that your notes stay useful.
Write down what happened, even when it went badly. A task that failed tells you where the child's limit is today, and that limit is the starting point for next week's adaptation. The course gives you a one-page format for these notes so they take two minutes, not twenty.
Is this course for you?
This course is for you if…
- Parents of a child with reduced vision who want a structured way to practise at home
- Special education teachers, speech therapists and psychologists who work with visually impaired children
- Rehabilitation and early-intervention staff who need practical activities rather than theory
- Assistants and students preparing to work with children with visual impairment
- Specialists in places without a resident visual impairment teacher who need a reference to return to
Probably not a fit if…
- Anyone looking for a medical diagnosis, a treatment plan or a cure for an eye condition
- Families who want live one-to-one sessions with a specialist — this is a recorded programme
- People who will not run at least one short practice task with a child between modules
- Specialists looking for clinical, surgical or pharmacological content
After the course
You finish with a working folder rather than a pile of notes. It holds an assessment record for one child, a set of adapted materials, a list of tasks that worked, and an individual route with goals for the next three months and dates for reviewing them.
At home the change is quieter than a breakthrough. A child finds a cup on a contrasting table without sweeping the whole surface. A picture book gets a second look. Getting dressed involves less guessing. These are small wins, and they are the ones that accumulate.
In a classroom or a rehabilitation setting you gain a shared language: you can explain to a family and to colleagues why a material was enlarged, why the lamp was moved, why the working distance changed — and what you will measure next.
You also gain a routine you can repeat with the next child, because the loop of observe, adapt and observe again does not depend on a particular set of toys or a particular starting point.
Questions before you buy
How much time does the course take each week?
Most people watch one or two lessons a week, which is roughly half an hour to an hour of viewing, plus twenty to thirty minutes of practice with a child. At that pace the full programme takes about three months. You can go faster or slower — nothing expires and there is no schedule to keep up with.
Do I need to be a specialist to follow it?
No. The course is written for parents as well as for teachers, psychologists and rehabilitation staff. Terminology is explained the first time it appears, and each module has a short section on what a non-specialist can reasonably assess at home and where a professional opinion is worth seeking.
How do I get access after payment?
As soon as the payment is confirmed you receive an email with your login details and a link to the lessons, usually within a few minutes. If the message does not arrive, check the spam folder first, then contact support and the access will be restored.
What if the course is not what I expected?
You have 14 days from purchase to ask for a refund. Watch the lessons, try one practice task with a child, and if the approach does not fit your situation, write to support within that period and the payment is returned.
What format are the lessons in?
Recorded video lessons of around twenty-five minutes each, followed by demonstration footage of activities in progress, presentation slides and printable protocols. There are written method notes for every module and short practical assignments that you complete on your own.
How long do I keep the material?
The lessons and downloadable materials stay in your account after purchase, so you can come back to them when a new child joins your group or when a familiar activity stops working. You can rewatch any lesson as many times as you like.
Does the course cover my child's specific eye condition?
The programme is pedagogical, not medical. It does not diagnose conditions or recommend treatment. What it does is teach you to observe how a particular child uses the vision they have and to adapt materials, lighting and distance accordingly — an approach that works across a wide range of visual profiles.
What do I need to run the practical tasks?
A computer or phone to watch the lessons, and a printer if you want paper copies of the protocols. The activities themselves use ordinary objects: a small torch, contrasting cards, coloured paper, cups, shapes and a few toys. No specialist equipment is required.
Are there live meetings or a fixed start date?
No. The programme is entirely recorded and self-paced, with no live sessions, no group calls and no start date to wait for. You begin the day you enrol and work through the modules in whatever order and rhythm suits you.
Start with one child, one task, one week
Twenty-five recorded lessons, printable protocols and a template for an individual route — everything you need to turn daily routines into deliberate practice.